The best lip filler work doesn’t announce itself. It reads as harmony, not volume. Friends might ask if you switched lipstick or slept better, not if you “had something done.” Achieving that natural look is as much about anatomy and proportion as it is about product and technique. After years of treating lips and correcting overfilled results, I’ve seen the same principles hold true across faces, ages, and styles. If you’re looking for subtle enhancement that still looks like you, here is the honest, practitioner-level guide you wish you’d had before booking.
What “Natural” Actually Means
Natural lip filler results respect your face’s baseline geometry. Your lips live inside a system: your teeth, bite, chin projection, philtrum length, nasal tip rotation, and the way your cheeks hold volume. If any one element is pushed out of balance, the lips start to look artificial. Natural isn’t code for “barely noticeable.” It means believable for you. Sometimes that is a refined cupid’s bow and a whisper of hydration in a 0.5 ml session, other times it is 1 ml placed carefully to restore lost definition after weight loss or pregnancy.
When clients bring lip filler before and after images, I ask what they see, not what they think they should want. Some people want to erase lip lines, others want symmetry, and some want a gentle lift of the vermilion border. Defining the target keeps you from chasing trends that do not suit your features.
Know Your Starting Point: Anatomy Drives Strategy
Not all lips accept filler in the same way. A thin, tight upper lip with a retruded chin behaves differently from a soft, everted lip with strong dental support. Here’s what guides treatment choice and dosage:
- Vermilion height and show. A tall pink area can accept more filler without looking stuffed. A short vermilion requires restraint and smart placement to avoid a shelf or “duck” projection. White roll and border integrity. Strong borders allow sharpening with microdroplets for definition without bulk. Weak borders benefit from gentle blending, not hard lines. Cupid’s bow prominence. If the bow is flat, restoring its peaks can lift the center with minimal volume, often creating the perception of a fuller lip in photographs. Tooth and bite support. If the teeth angle inward or the bite collapses, the upper lip lacks scaffolding. Aggressive forward filler projection in this scenario often looks artificial. Sometimes pairing modest lip filler with a chin or perioral support plan yields the most natural results. Skin quality. Smokers lines, sun damage, and perioral wrinkles often respond better to soft, hydrating lip filler types placed superficially for hydration and smoothing, with only a trace of volumizing filler for shape.
A good clinician will map your lip in zones Clarkston lip filler services and decide if vertical height, horizontal length, or definition will deliver the natural look you want. That judgment, more than any single product, determines whether you love your lip filler results.
Choosing the Right Product: Filler Types and Their Effects
Most natural lip filler treatments use hyaluronic acid (HA), a sugar our bodies already recognize. HA fillers vary in viscosity, elasticity, and cohesivity. Those traits decide whether a product stays put in the border, softens lines, or builds structure.
I prefer softer, more flexible HA gels in the body of the lip for hydration and smoothness, and slightly more structured gels for the vermilion border and philtral columns. Think of it like tailoring fabric to the job: silk for drape, cotton twill for structure. Your practitioner might mention brands or terms like “low G prime” for soft gels and “mid G prime” for border support. The best lip filler choice depends on your tissue, animation, and goals.
Avoid permanent or semi-permanent fillers in the lips. HA offers reversibility with hyaluronidase, a critical safety and aesthetic advantage if you need correction.
How Much to Use: 0.5 ml, 1 ml, and the Power of Staged Treatment
The internet loves round numbers, but lips do not. A natural look often comes from modest dosing spaced over time. For first timers or those seeking a subtle look, 0.5 ml can meaningfully improve hydration and definition. A full 1 ml session can still look natural if placement is strategic and you have enough tissue to hold it. The magic is pacing: you can always add, but taking away means dissolving and starting over.
Staging also helps your brain adjust. It is common to read your lips as “too big” for a week after any visible change. A planned lip filler top up at 2 to 4 weeks lets swelling resolve and guides the final fine tuning.
The Consultation: Questions That Predict Great Outcomes
A thorough lip filler consultation should feel part medical, part design session. Share past filler experiences, allergies, vascular or autoimmune issues, and any history of cold sores. Bring photos of your lips a decade ago if your goal is restoration, not reinvention. Ask to review the practitioner’s lip filler before and after images, and look for consistency, soft borders, and variation across ages and ethnicities.
I ask clients to rate priorities: hydration, definition, symmetry, volume, or line-softening. We then map a lip filler process that fits your anatomy and calendar. If wedding photos are coming, we plan the timeline, including lip filler swelling stages and a contingency for a touch up. If you are unsure, we start with a half syringe and revisit.
If you are searching “lip filler near me,” vet qualifications. You want a medical professional with training in facial anatomy, hyaluronidase use, and management of rare complications. Reviews help, but direct portfolio evidence and a thoughtful risk discussion carry more weight.
The Procedure: Techniques That Look Like Nature
An elegant lip filler procedure respects layers, angles, and vascular safety. The aim is shape, not bulk. I use a mix of micro-aliquots with a fine needle and a cannula when appropriate. Needle work offers crisp definition at the border and cupid’s bow. Cannula placement can reduce bruising and help with even distribution in the body of the lip for a pillowy, not lumpy, finish.
Patterns matter. The so-called tenting technique can sharpen the border, but overuse can create stiffness and vertical ridges. Retrograde threads in the vermilion can add soft fullness. Tiny depot injections in the white roll can restore a gentle light-catching edge. Minimal product placed in the philtral columns can lift the center subtly. Less filler with more passes often beats big boluses for a natural look.
Numbing is individual. Topical anesthetic works for most. Some fillers include lidocaine, which eases the lip filler injections as you go. If you are worried about lip filler pain level, ask about dental blocks. They add comfort, though they can temporarily distort the lip shape, so an experienced injector will wait for symmetry before placing product.
What to Expect Right After: Swelling, Bruising, and the Timeline
Lips are vascular and mobile, so lip filler swelling is normal, and it can look dramatic for 24 to 48 hours. Many clients have the most pronounced swelling on the morning after. Bruising varies with technique, your tendency to bruise, and meds like aspirin or fish oil.
A typical lip filler results timeline looks like this: Day 1, a puffy preview that overestimates final size. Days 2 to 3, peak swelling, sometimes with unevenness. Day 4 to 7, a return to near-baseline with the new shape peeking through. After one week, most people feel comfortable in public without makeup camouflage. After one month, you see the settled contour and hydration, which is when we judge whether a lip filler touch up is useful.
If you get a cold sore flare, call your provider. Antivirals help. If you have progressive whiteness, severe pain, or mottled discoloration, contact your injector immediately. Those could be signs of vascular compromise, rare but urgent.
Aftercare That Protects Your Result
The first 48 hours set the tone for healing. I advise clients to keep lips clean, avoid intense exercise, heat, or alcohol the first day, and use cool compresses in short intervals. Sleep with your head elevated for the first night if you are prone to swelling. Skip aggressive lip filler massage unless your clinician instructs you. Over-massaging can move product where you do not want it.
Hydration matters. HA draws water, so drink fluids and use a bland ointment for the first day, then switch to an unscented balm. Avoid dental procedures and vaccinations for a week either side of your lip filler appointment if possible to reduce inflammation overlaps. Review a short list of what not to do: no saunas, no facial cupping over the mouth, and no new active skincare acids touching the border for several days.
The Safety Conversation: Benefits, Risks, and Red Flags
Lip fillers deliver real benefits: refined definition, better lipstick hold, softened lines, restored symmetry, and a hydrated sheen that reads youthful without shouting volume. The lip filler effects that clients love most often come from micro-adjustments that make the mouth look rested and proportional.
There are also risks. The common ones are swelling and lip filler bruising. Less common are nodules, asymmetry, and cold sore reactivation. Rare but serious complications include vascular occlusion, which can threaten tissue if not identified and treated promptly. This is why lip filler safety means choosing someone who carries hyaluronidase, understands vascular anatomy, and gives you direct contact instructions for urgent concerns.
If you see lip filler gone wrong online, it is often the result of heavy-handed technique, poor product choice, or overfilling over time. Fortunately, HA fillers are reversible. Lip filler dissolving with hyaluronidase can correct migration, lumps, or shape errors. Dissolving stings and can temporarily deflate the lips more than expected, but it clears the slate for a fresh, more natural plan.
Pricing, Longevity, and Maintenance
Lip filler cost varies by region, clinic, and product. In most metropolitan areas you will see ranges from a few hundred dollars for 0.5 ml to over a thousand for premium brands or advanced technique. Do not chase the lowest price. You are paying for judgment, sterile technique, and emergency readiness as much as you are paying for filler.
Lip filler duration averages 6 to 12 months, depending on metabolism, product choice, and placement depth. Hydrating fillers that live more superficially may feel like they fade faster, while more structured gels along the border can hold shape longer. Athletes, fast metabolizers, and heavy animators may notice faster turnover. Plan maintenance twice a year if you want a steady, natural look rather than big seasonal swings.
Trend Versus Timeless: What Actually Ages Well
Trends come and go. We have cycled through extra full pillows, exaggerated heart shapes, and sharply coded Russian-style straight pillars. Some of these techniques can be adapted in micro-doses, but if your goal is natural, focus on classic ratios and soft borders. The traditional 1:1.6 lower-to-upper lip proportion is a starting compass, not a hard rule. Faces with a strong chin and short philtrum can carry a fuller top lip. Faces with a longer philtrum and petite lower third look better with restraint up top and subtle emphasis on the lower vermilion. Your injector should speak in these relational terms, not just milliliters.
Alternatives and Complements: Not Every Goal Needs Filler
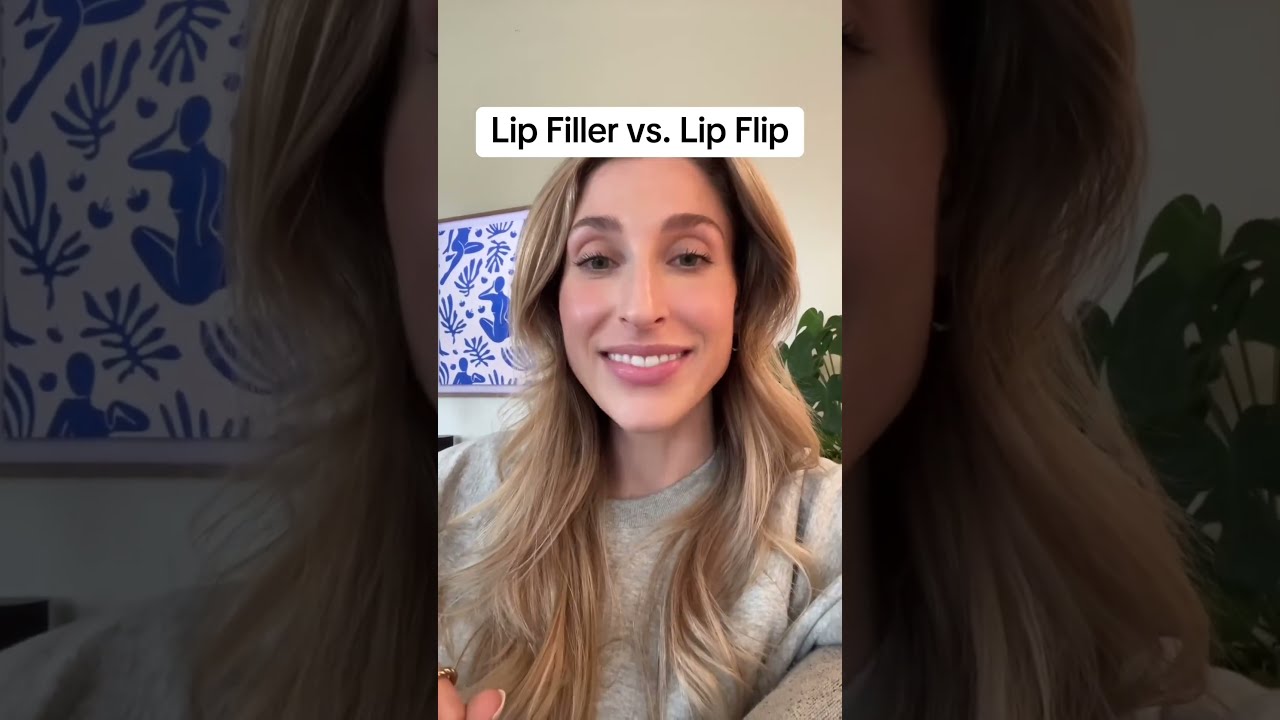
If you want a slight upper lip lift without volume, a lip flip with botulinum toxin can relax the orbicularis oris muscle so more pink shows when you smile. This does not add bulk. It lasts 6 to 10 weeks on average and pairs nicely with minimal filler for definition. With age-related vertical lip lines, tiny droplets of soft HA in the skin, sometimes combined with light resurfacing, smooth the area without changing lip size.
For those wary of injections, topical plumpers and microneedling devices offer transient effects. They won’t build shape, but they add temporary volume and hydration. If you are deciding between lip filler vs Botox vs a lip flip, consider your primary goal: structure and shape belong to filler, muscle relaxation to toxin, and surface smoothness to skin treatments.
Managing Expectations and Reading the Mirror
The most common surprise for first timers is how the lips feel in the first week. They can feel tight or bouncy when speaking. This sensation fades. Photos can also trick you. Camera angles amplify asymmetries you never noticed. My advice: judge your lip filler results after one month, not one day. Check symmetry in motion, not only at rest. Whistling, smiling, and speaking show how the filler integrates with your expressions.
Be realistic about side effects, especially the lip filler swelling timeline. If you cannot have visible swelling for a big event, schedule earlier, or consider a micro-session for hydration and definition only. If you are prone to bruising, plan for strategic concealer and clear balms for a week.
When and How to Top Up
A natural maintenance rhythm favors small, periodic adjustments. If you loved your result at week four and notice soft fade by month six, a 0.3 to 0.5 ml lip filler top up often restores the shape without the full “new” look. Over time, your lips may hold shape longer. Conversely, if migration or thickness starts to overshadow definition, it might be time to pause, dissolve, and reset. That restraint protects you from the incremental drift that leads to the “everyone can tell” look.
The Correction Playbook: If You Don’t Love Your Result
Not every outcome hits the mark. Maybe the border feels too sharp, or a corner looks heavy. If it is within the first two weeks, wait for swelling to resolve. Many small lumps resolve with gentle guided massage and time. If an edge or projection is persistently off, targeted hyaluronidase can shave a millimeter and restore balance. Think sculpting, not erasing. If migration is obvious above the border, full reversal and staged rebuilding usually beats patchwork fixes.
Choose a practitioner who is comfortable with lip filler reversal. It takes humility and skill to adjust a result, but it is the surest path back to natural.
What a Great Appointment Looks Like
You know you are in the right place when the appointment feels unhurried and collaborative. The practitioner asks about your facial goals, not just lip size. They photograph from multiple angles, mark vascular landmarks, and discuss techniques in plain language. They talk about lip filler risks and aftercare without drama, and they give you a plan for contact if you are worried later. They use conservative volumes, check symmetry during the session, and stop if swelling threatens to distort their placement. You leave with a small care kit and a follow-up date, not a sales pitch.
If you are browsing lip filler reviews, pay attention to comments about listening, subtlety, and how the lips look months later. The best clinics showcase diverse lips, including mature mouths with lines, not only twenty-something pillows bathed in ring light.
Frequently Asked Real Questions
Does lip filler hurt? Mild to moderate discomfort. Topical numbing and lidocaine in the product make it tolerable. Dental blocks are an option for the sensitive.
How long does lip filler last? Expect 6 to 12 months. Some hydration-focused results feel like they fade around 4 to 6 months, but structure may persist longer.
Will I bruise? Many people get at least a dot or two. Plan for a week during which makeup might be useful. Cannula techniques can reduce bruising but are not bruise-proof.
Can I work out after? Wait at least 24 hours. Elevated heart rate and heat can worsen swelling and bruising.
What if I do not like it? HA fillers are reversible. Hyaluronidase can dissolve unwanted product, fully or in small areas, often within minutes to days depending on dose and product.
Is 0.5 ml worth it? Yes. A half syringe can transform definition and hydration, especially for first timers seeking a lip filler natural look.
Are there long-term side effects? Most people tolerate HA well. Repeated overfilling can stretch tissue over time, which is why conservative dosing and breaks matter. Rare inflammatory responses can occur and are manageable by trained clinicians.
A Simple, Reliable Path to Natural Results
Stripping lip filler down to first principles helps. Start with a clear, personal goal that fits your face. Choose HA for safety and flexibility. Use the least amount required to achieve the effect. Place product where your anatomy will carry it well. Respect the lip filler healing time and judge results at one month. Maintain with small, thoughtful touch ups, not big swings. And partner with someone who cares as much about your future photos as your after photo in the clinic.
If you are weighing lip filler pros and cons, the scales tip toward satisfaction when the plan is individualized and staged. Lips are expressive and central to identity. Done well, lip filler treatment does not change that identity. It supports it, quietly. That quiet is what makes people assume you just look well-rested, or that you finally found the right shade of gloss.
Preparing for Your Appointment
A few small steps raise your odds of smooth recovery. Stop nonessential blood-thinning supplements like fish oil, ginkgo, and high-dose vitamin E a week prior if your physician approves. Avoid alcohol the night before. Eat a light meal so you are not lightheaded. If you get cold sores, ask for antiviral prophylaxis. Bring reference photos and be honest about your fears. Tell your injector if you have dental work planned soon or if you have had previous filler, even if it was years ago.
Know the lip filler procedure steps: photographs, cleansing, numbing, mapping, injections, molding where needed, and a final symmetry check. Expect 30 to 60 minutes, depending on complexity. Plan the rest of your day for low-key activities. A studio-lit dinner right after is not your friend.
When Natural Still Means Noticeable
Subtle does not equal invisible. A well-executed 1 ml session can create a visible change that still looks innate. Colleagues will comment that your makeup looks fresher or your smile looks softer. That is a natural look. It is especially satisfying for clients with lip asymmetry, where even minor adjustments rebalance the face. I have seen patients who spent years hiding a tilted cupid’s bow with lip liner finally wear clear balm with confidence. That is the right payoff.
Final Touches: Small Choices That Make a Big Difference
One reason natural results stand out is the finish work. A crisp border without hardness, corners that lift slightly rather than drag down, and a hydrated surface that catches light evenly all matter. I often keep a whisper of product for the very end to shape a cupid’s bow peak or smooth a tiny step-off at the midline. These are millimeter-level adjustments, but they read on the face immediately.
If you are tempted by dramatic results, sleep on it. Big changes are easy to chase and harder to live with. Natural lip filler is a craftsmanship process, not a single step. Working slowly preserves both your tissues and your taste.
A Short, Practical Checklist
- Define your goal in plain words: hydration, shape, symmetry, or line-softening. Choose a clinician who shows varied lip filler techniques explained with clear photos. Start with 0.5 to 1 ml, staged if uncertain. Add later rather than regretting. Plan for the lip filler recovery timeline and avoid heat, alcohol, and heavy exercise for 24 hours. Reassess at one month. Touch up lightly if needed, or dissolve selectively if something bothers you.
The Quiet Confidence Test
You know you have achieved a natural lip filler result when you forget about your lips for most of the day. You are not avoiding certain words or angles. Your lipstick behaves better. People who know you well might puzzle over what changed and finally shrug, deciding you simply look refreshed. That calm confidence is the whole point. It is also the best protection against trends that will not last longer than your filler.
For anyone on the fence, book a consultation, not a commitment. Ask the questions above, look at healed results, and plan a conservative start. The most satisfying outcomes I see come from patience, precision, and the willingness to say “that is enough” at exactly the right moment.